Add a redirect
The following requirements must be met:
- ☑ A domain has been added, see Section Add a domain.
- ☑ A DNS record has been added for the required subdomains, see Section Add a DNS record.
Proceed as follows to add a redirect:
- ► Open the Redirects for <subdomain name> view, see Section Redirects.
- ► Click on the Add redirect button.
- ↳ The Add redirect dialog opens.
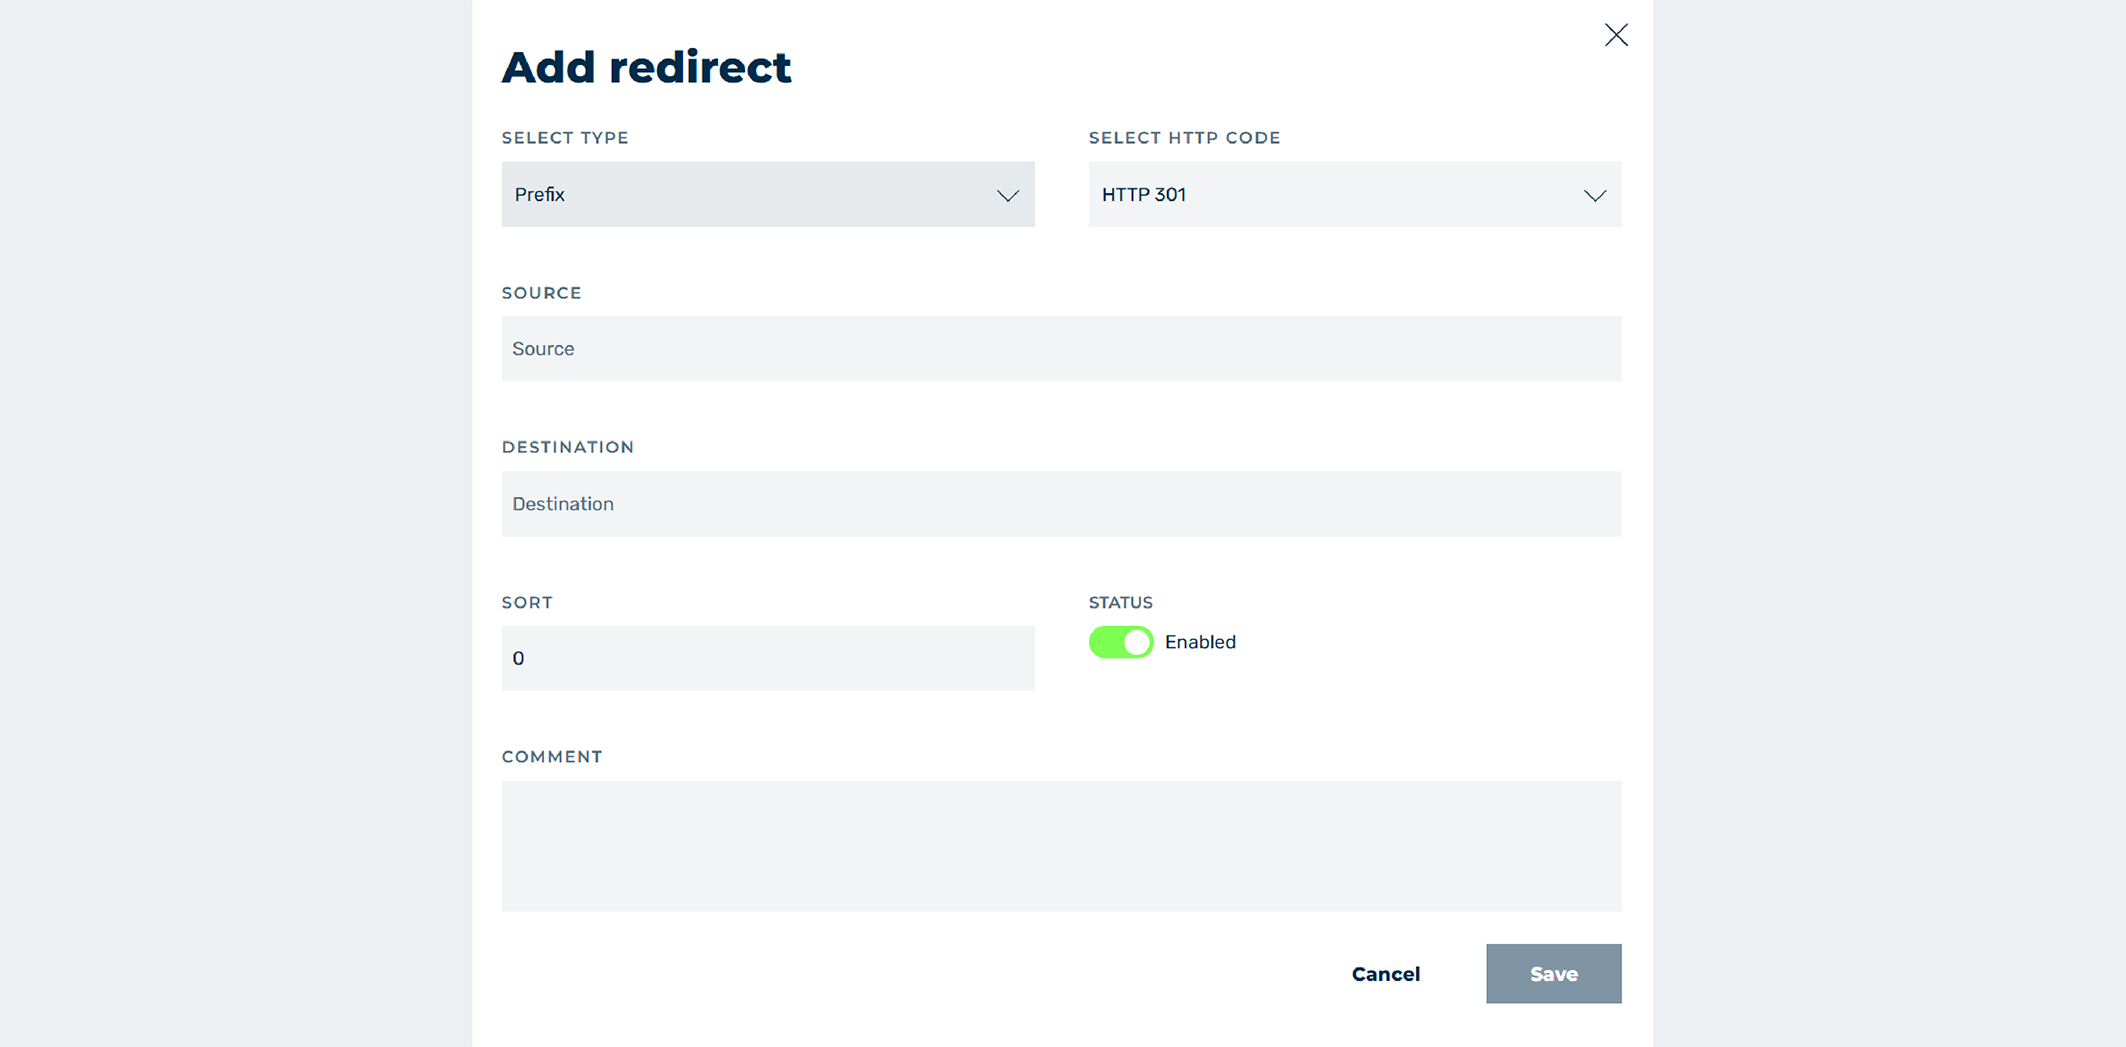
Add redirect dialog
-
► In the drop-down list under TYPE, specify which part of the subdomain should be redirected, see Section Add new redirect / Edit redirect dialog.
Example
Using
.jpgaffects all JPG files on your website. -
► In the drop-down list under HTTP CODE, specify the status code to be returned when redirecting to the destination URL.
Note
The HTTP codes 301 and 302 are also cached by the browser and can lead to further redirects through the cached 302 redirect despite the redirect being disabled at Myra.
Note
Myra recommends using HTTP 302 as a temporary redirect.
-
► In the text field under SOURCE, enter the path you want to redirect.
Note
You can use regular expressions to identify and specify different paths of a domain.
-
► In the text field under DESTINATION, enter the path to which the redirect should be made.
- ► If necessary, enter a value in the text field under SORTING to specify the order in which the redirects are processed.
- ► If necessary, enable or disable the entry using the switch under STATUS.
- ► If necessary, enter an individual description for the record in the text field under COMMENT.
- ► Click on the Save button.
- ➔ The dialog closes and the new entry appears in the list of entries.