Add additional rules to the WAF Tag (optional)
If necessary, you can add additional WAF rules to the WAF Tag, thereby extending the rules predefined by Myra to meet your needs.
Proceed as follows to add a WAF rule to a WAF Tag:
- ► Navigate to the Custom Tags area.
- ► Select the WAF Tag you copied earlier and click on the
 icon.
icon. - ↳ The WAF rule for tag <Tag name> view opens.
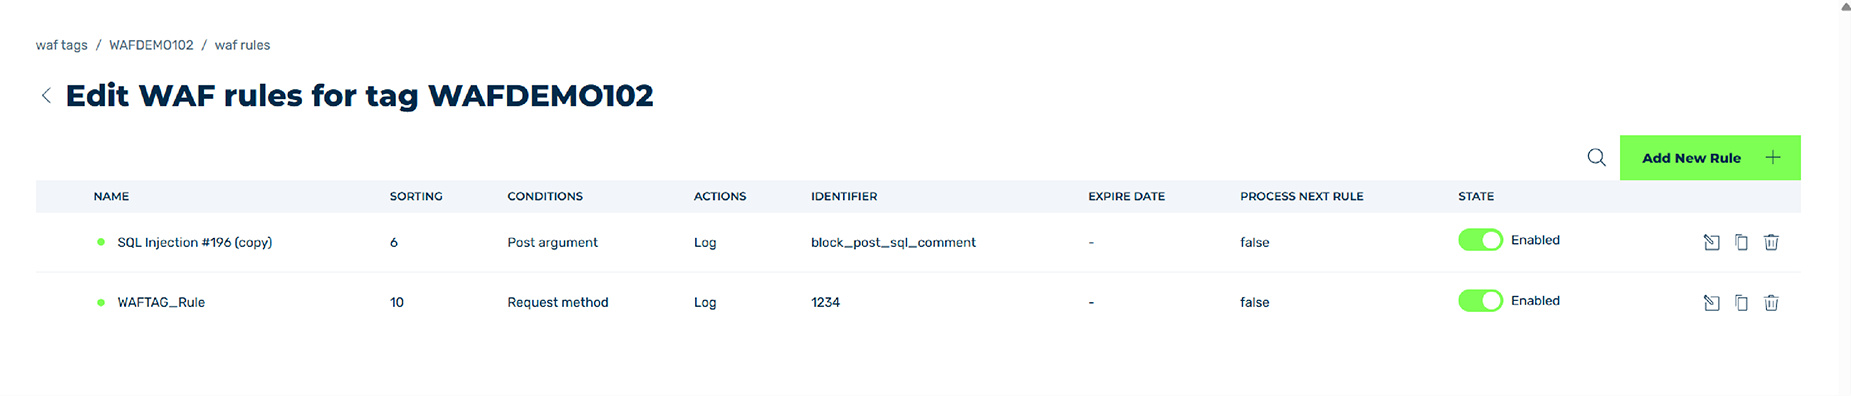
Edit WAF rule for tag view
- ► Click on the Add WAF rule button.
- ↳ The New rule for tag <Tag name> view opens.
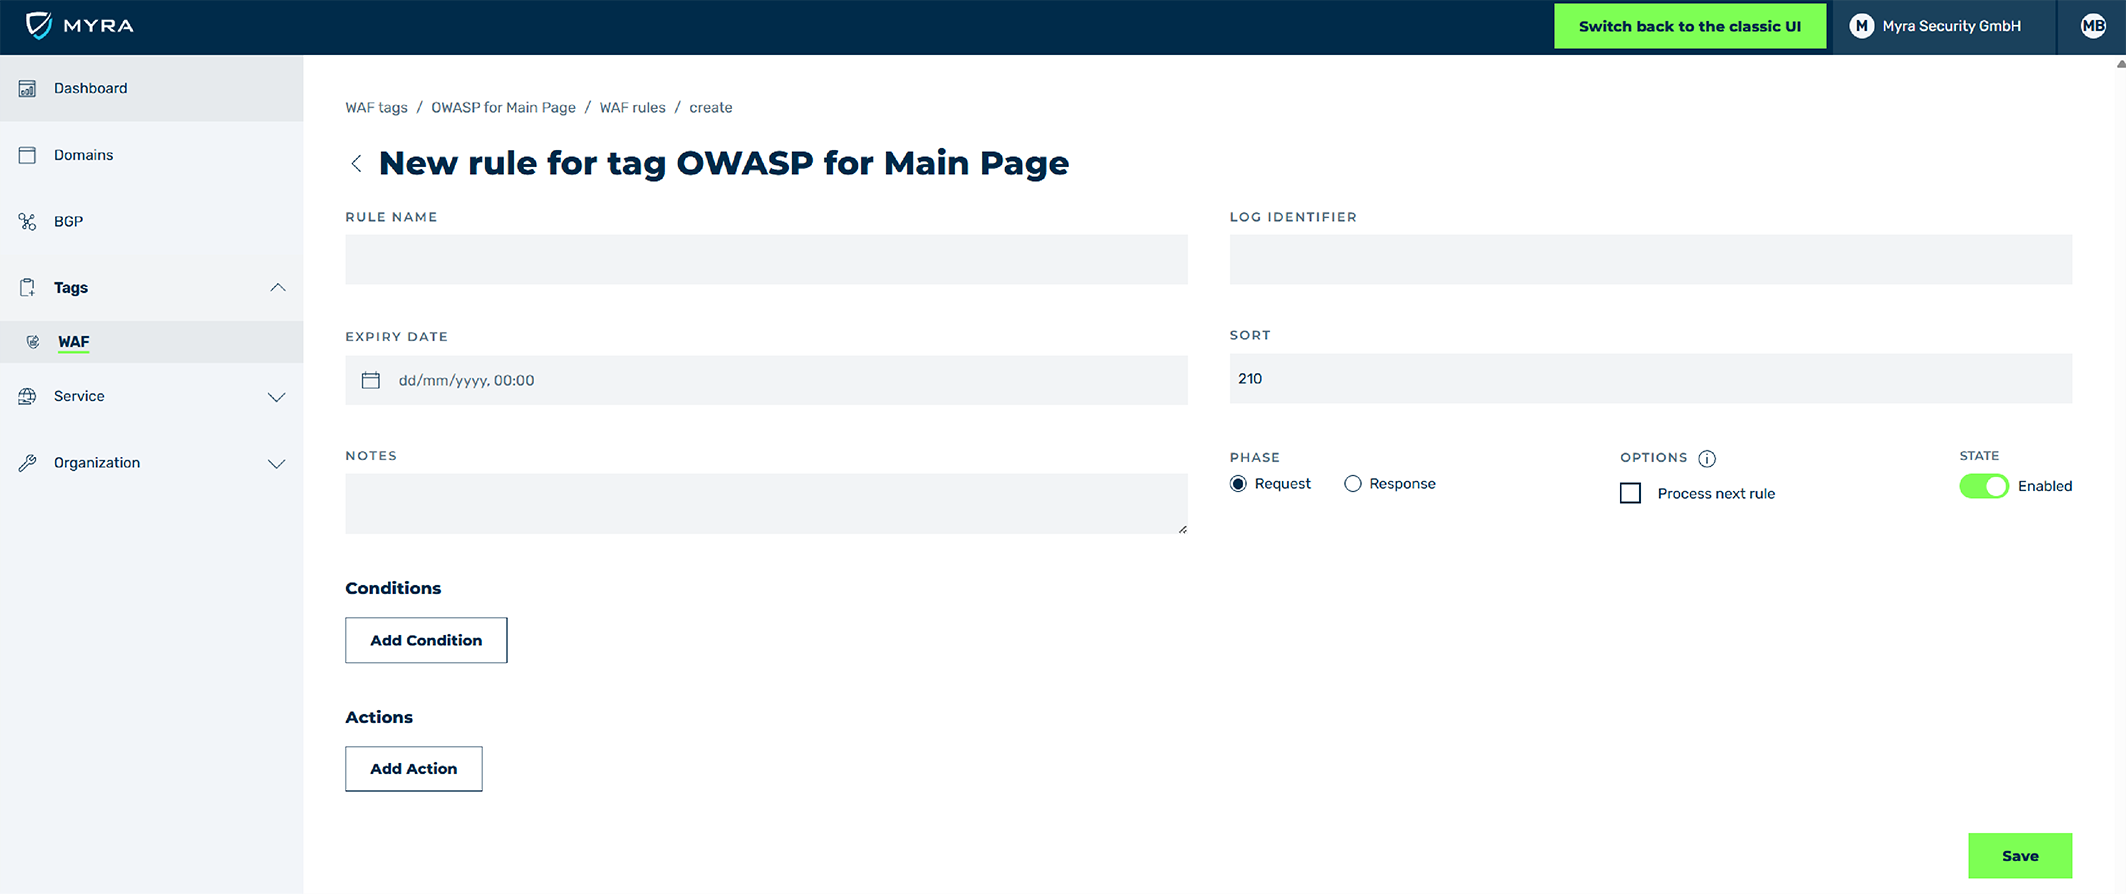
Add WAF rule
- ► In the NAME text field enter the name of the WAF rule.
- ► In the LOG ID text field enter a unique identifier for recognising the WAF rule in the logs.
- ► If necessary, define a validity date for the WAF rule in the EXPIRY DATE text field.
-
► If necessary, define the positioning of the WAF rule in the processing order of all WAF rules in the WAF Tag in the SORTING text field.
Note
If a value that has already been assigned is entered under SORTING, the WAF tag is set to this value and all subsequent tags are incremented by one.
-
► If necessary, enter an individual comment in the COMMENTS text field.
-
► Under PHASE define whether incoming or outgoing requests should be handled by the WAF rules.
Note
A response is handled as follows:
- Redirect
- IP Allow/Blocklist
- WAF
- Request Limiter
- Antibot
A WAF rule has no effect on redirects or IP addresses on the allowlist or blocklist. If one of these conditions occurs before the defined WAF rule, the WAF rule is no longer executed.
Note
The phase can no longer be changed after adding a new WAF rule.
-
► Under OPTIONS activate the selection box to ensure that even after one condition has been fulfilled, all other conditions are still processed.
Note
For new rules, Myra recommends enabling the option to track in the logs which condition triggered when.
In addition, Log must be added as an action.
Note
This option can only be enabled if Log has been selected as action, and no other action.
Otherwise, you will not be able to save it.
-
► Click on the Add Condition button under Conditions to add a condition to the WAF rules.
- ↳ An empty entry field under Conditions opens.
- ► Fill in all parts of the conditions, see Section Description of conditions for WAF rules.
- ► If necessary, repeat the steps to add a condition.
- ► Click on the Add Action button under Actions to add an action to the WAF rules.
- ↳ An empty entry field under Actions opens.
- ► Fill in all parts of the action, see Section Description of actions for WAF rules.
- ► If necessary, repeat the steps for adding an action.
-
► Finally, add an action Log to the actions.
Note
For new rules, Myra recommends adding the action Log to track in the logs which condition was triggered and when.
-
► Click on the Save button.
- ➔ The overview of WAF rules opens and the new WAF rule appears in the list of WAF rules.