Updating SSL/TLS Certificate
To ensure that communication between your infrastructure and Myra remains reliable at all times and that security is maintained, it is necessary to renew SSL/TLS certificates that have expired or are about to expire.
The following requirements must be met:
- ☑ A domain has been added, see Section Add a domain.
- ☑ A DNS record has been added for the required subdomains, see Section Add a DNS record.
- ☑ An SSL/TLS certificate has been uploaded, see Section Upload SSL/TLS certificate.
Proceed as follows to renew an SSL/TLS certificate:
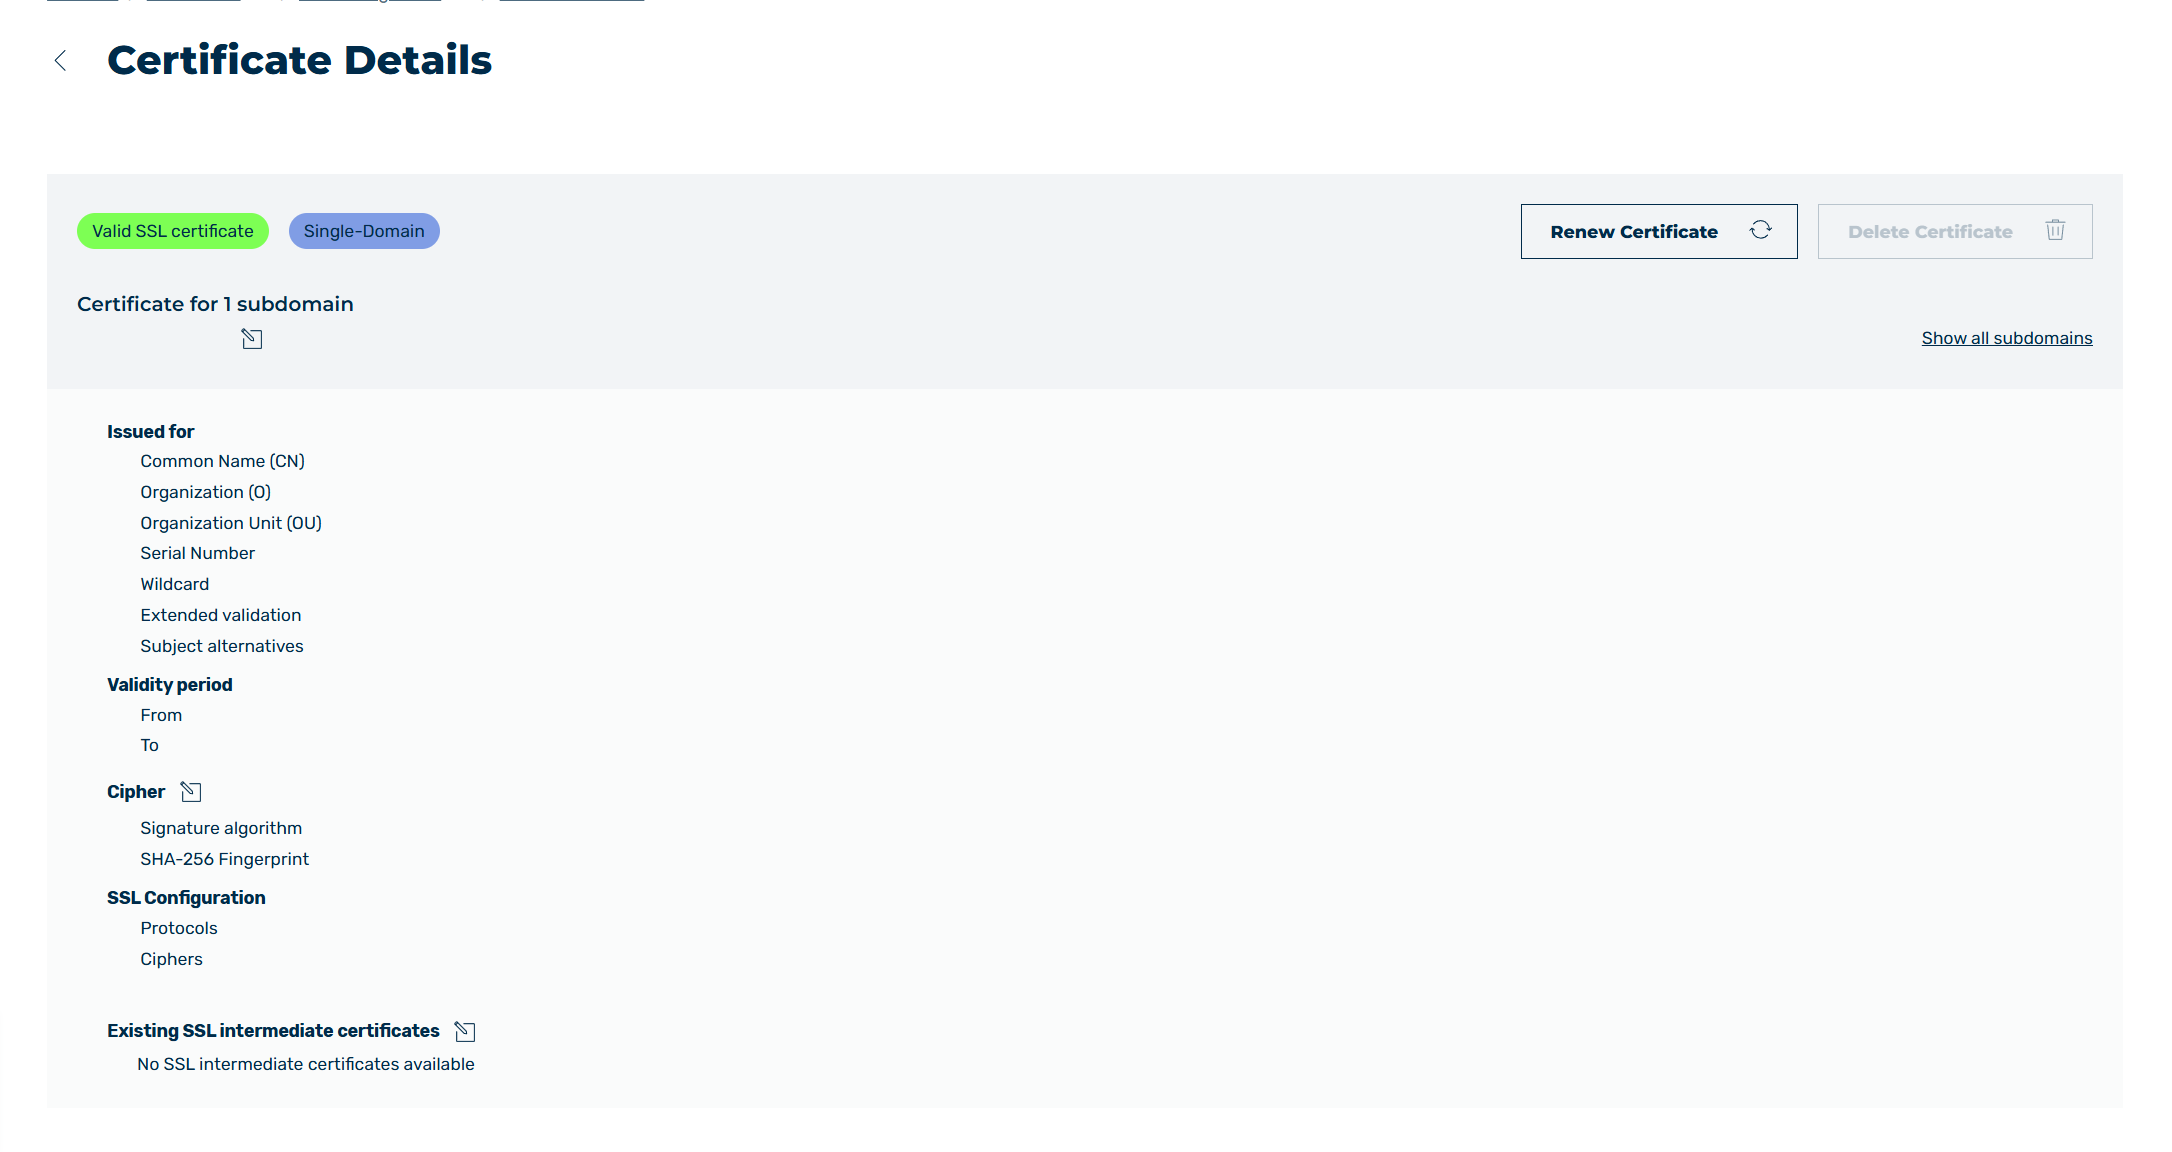
SSL/TLS Certificate Details view
- ► In the SSL/TLS Certificate Details view, click on the Renew Certificate
 button.
 - ↳ The SSL/TLS Certificate Configuration dialog opens.
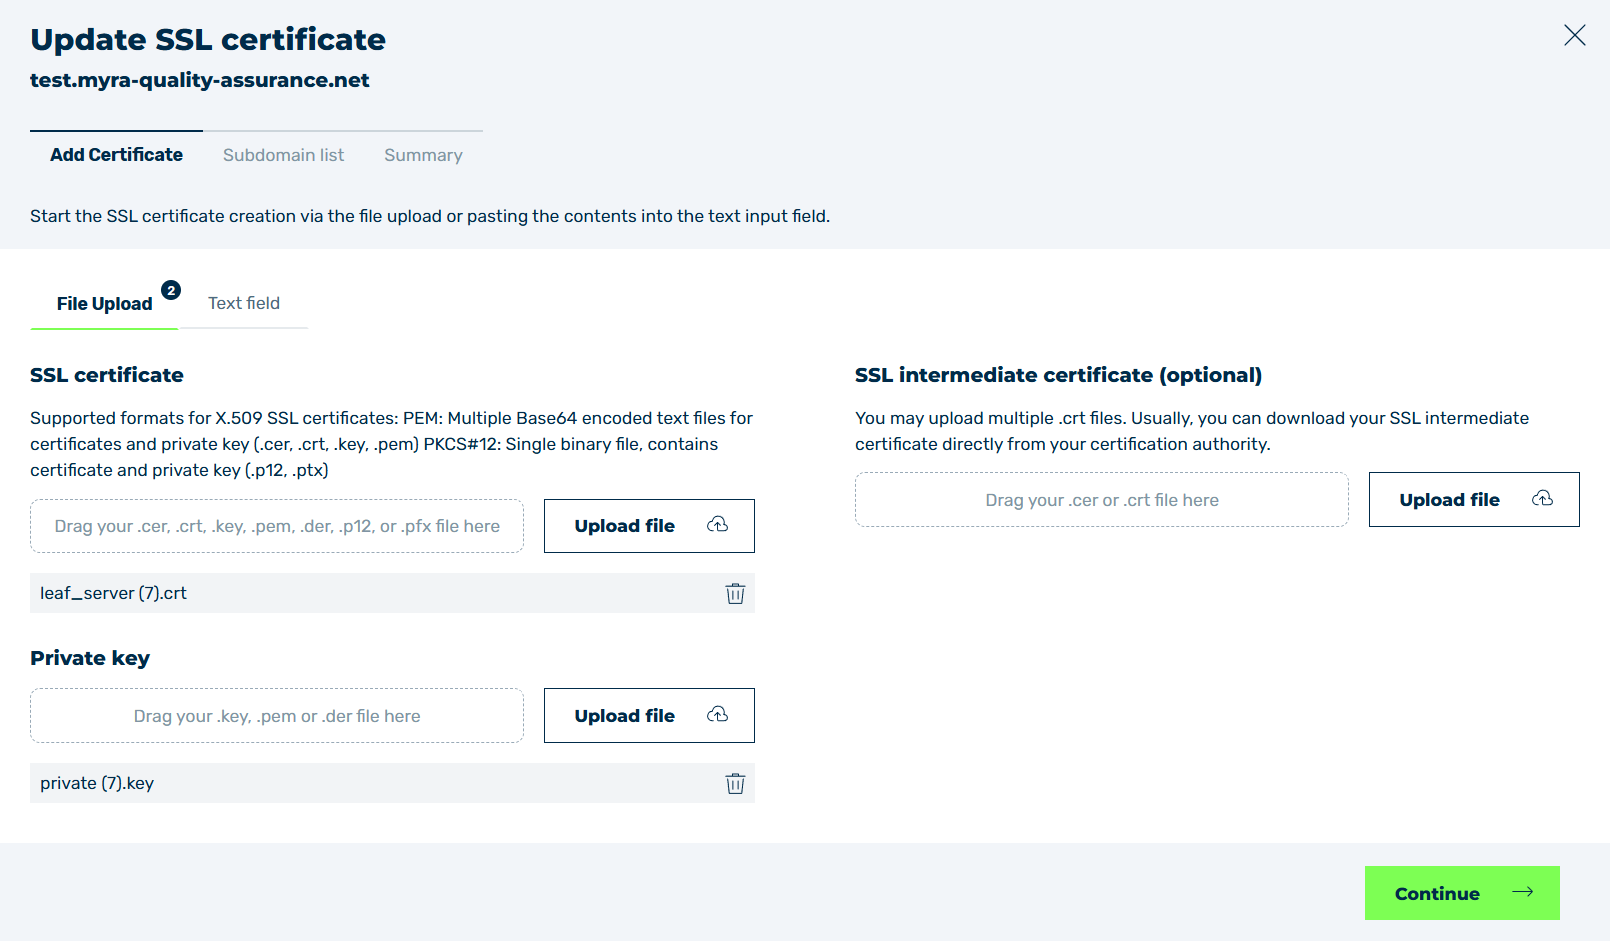
Configure SSL/TLS Certificate view
-
► Upload the SSL/TLS certificate using one of the following methods:
-
▷ Click on the File upload tab if you want to upload an SSL/TLS certificate file from your computer.
- ▷ Click on the Upload a file button in the SSL/TLS certificate area and select the certificate on your computer.
-
↳ Alternatively, you can drag and drop the SSL/TLS certificate into the corresponding box in the SSL/TLS certificate area.
- ▷ Click on the Text field tab if you want to enter the SSL/TLS certificate as text, and paste the text into the corresponding field.
-
-
➔ As soon as the SSL/TLS certificate has been uploaded, two more options appear for uploading the private key and an intermediate certificate.
Note
The Myra App supports the following SSL/TLS certificates in X.509 format:
-
PEM
Multiple Base64-encrypted text files for SSL/TLS certificates and private keys (.cer, .crt, .key, .pem) -
PKCS#12
Single binary files containing the SSL/TLS certificate and private key (.p12,.pfx)
-
-
► Upload the private key in the Private key area. Proceed as you did when uploading the SSL/TLS certificate.
- ► If available, upload the intermediate certificates in the SSL/TLS intermediate certificate (optional) area. Proceed as you did when uploading the SSL/TLS certificate.
- ► Click on the Continue button to continue the process.
- ↳ The Subdomain list tab opens.
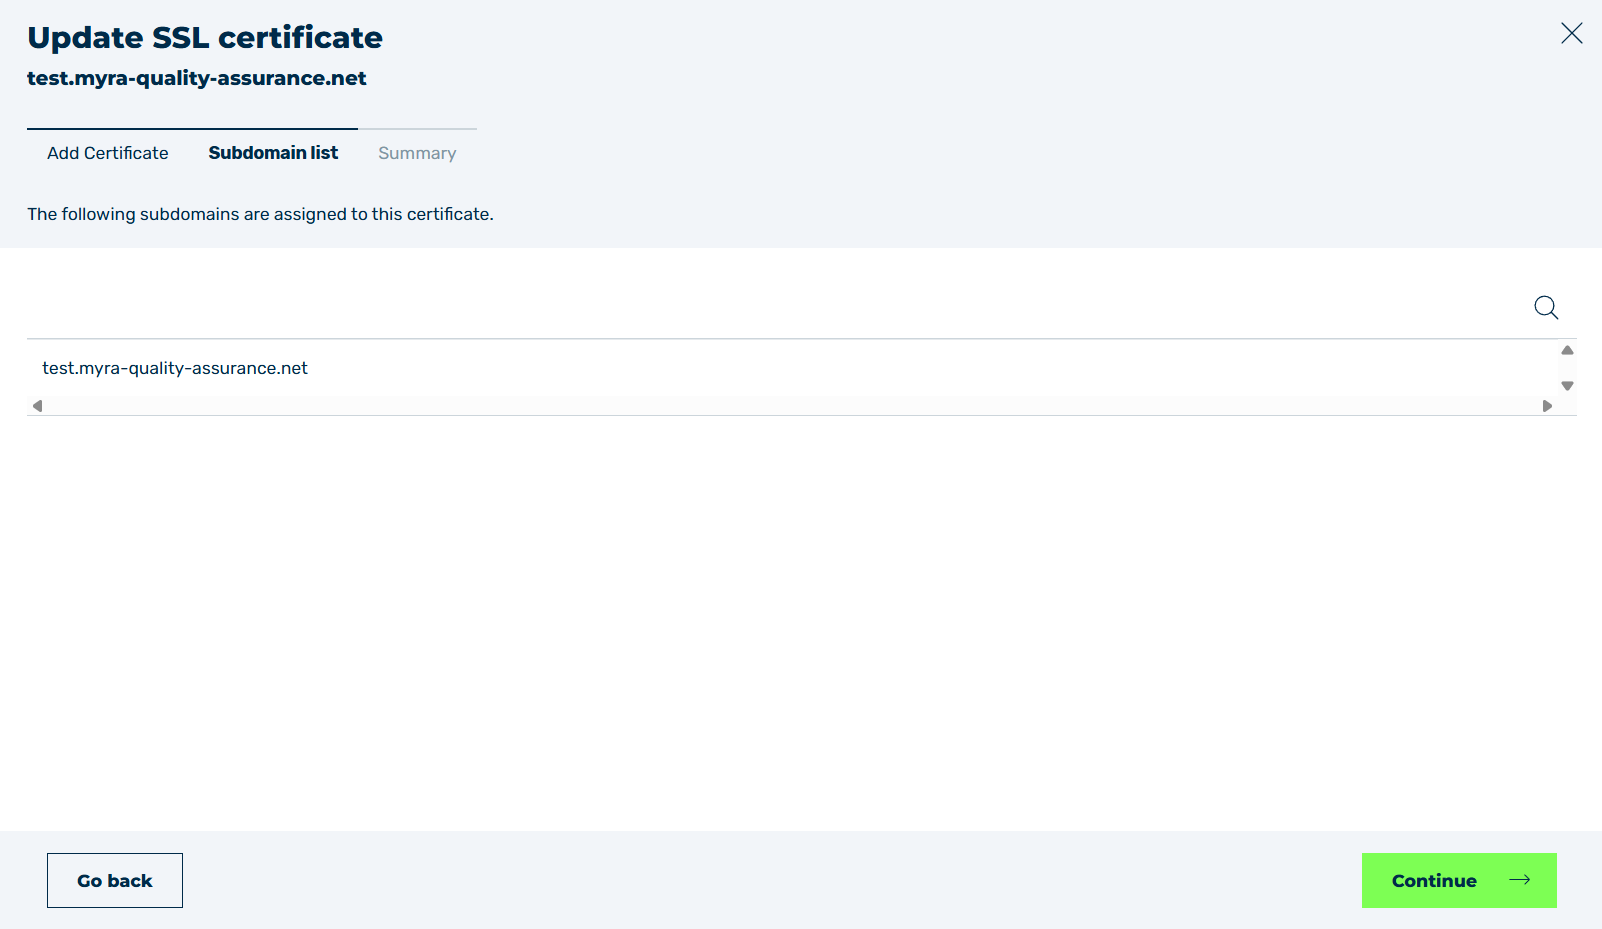
Subdomain list tab
-
► Verify that all subdomains are included in the new SSL/TLS certificate.
Note
If an entry in the list shows an icon
 next to its name, the certificate does not include that subdomain.
You can still select the highlighted subdomain in the following way:
- ► Select the highlighted subdomain.
- ↳ A message appears below the list of entries.

Force upload of SSL/TLS certificate
- ► Check the checkbox in the message.
- ➔ Highlighted subdomains are now also included in the SSL/TLS certificate.
-
► Click on the Continue button to continue the process.
- ↳ The Summary tab with a summary of all SSL/TLS certificate settings opens.
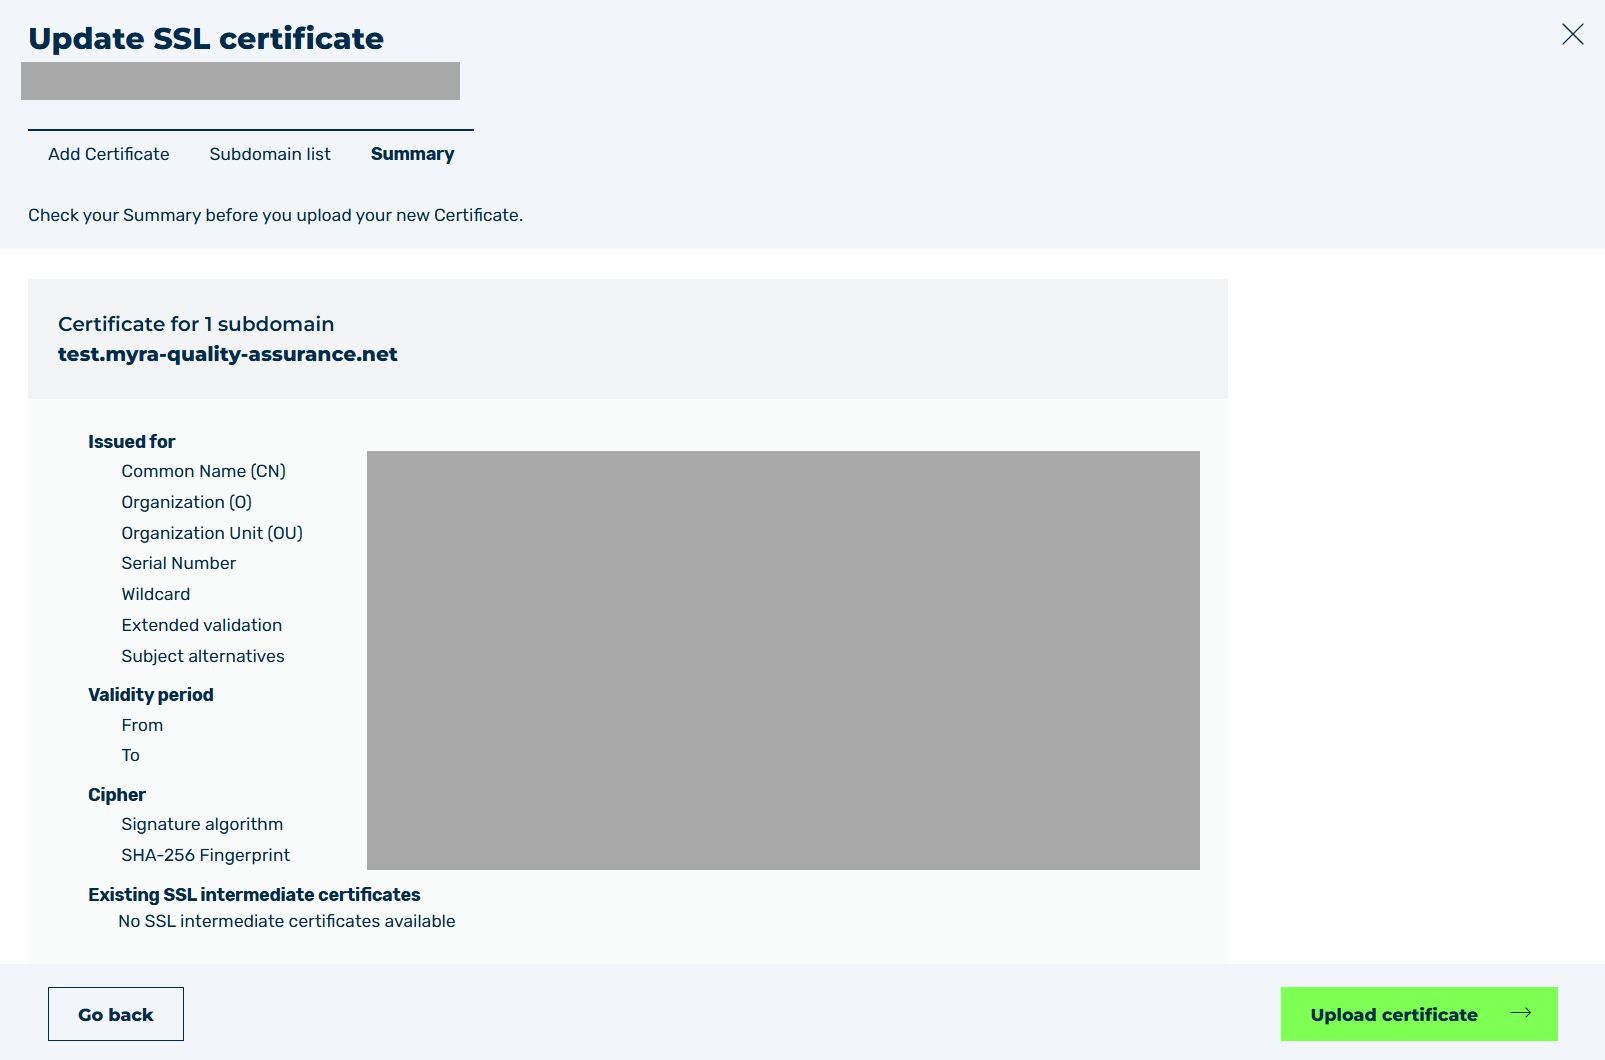
Summary tab
- ► Check that the settings are complete and correct.
- ► To complete the upload of the certificate, click on the Upload certificate button.
- ➔ The dialog closes and the SSL/TLS certificate appears in the SSL/TLS Certificate Management view.
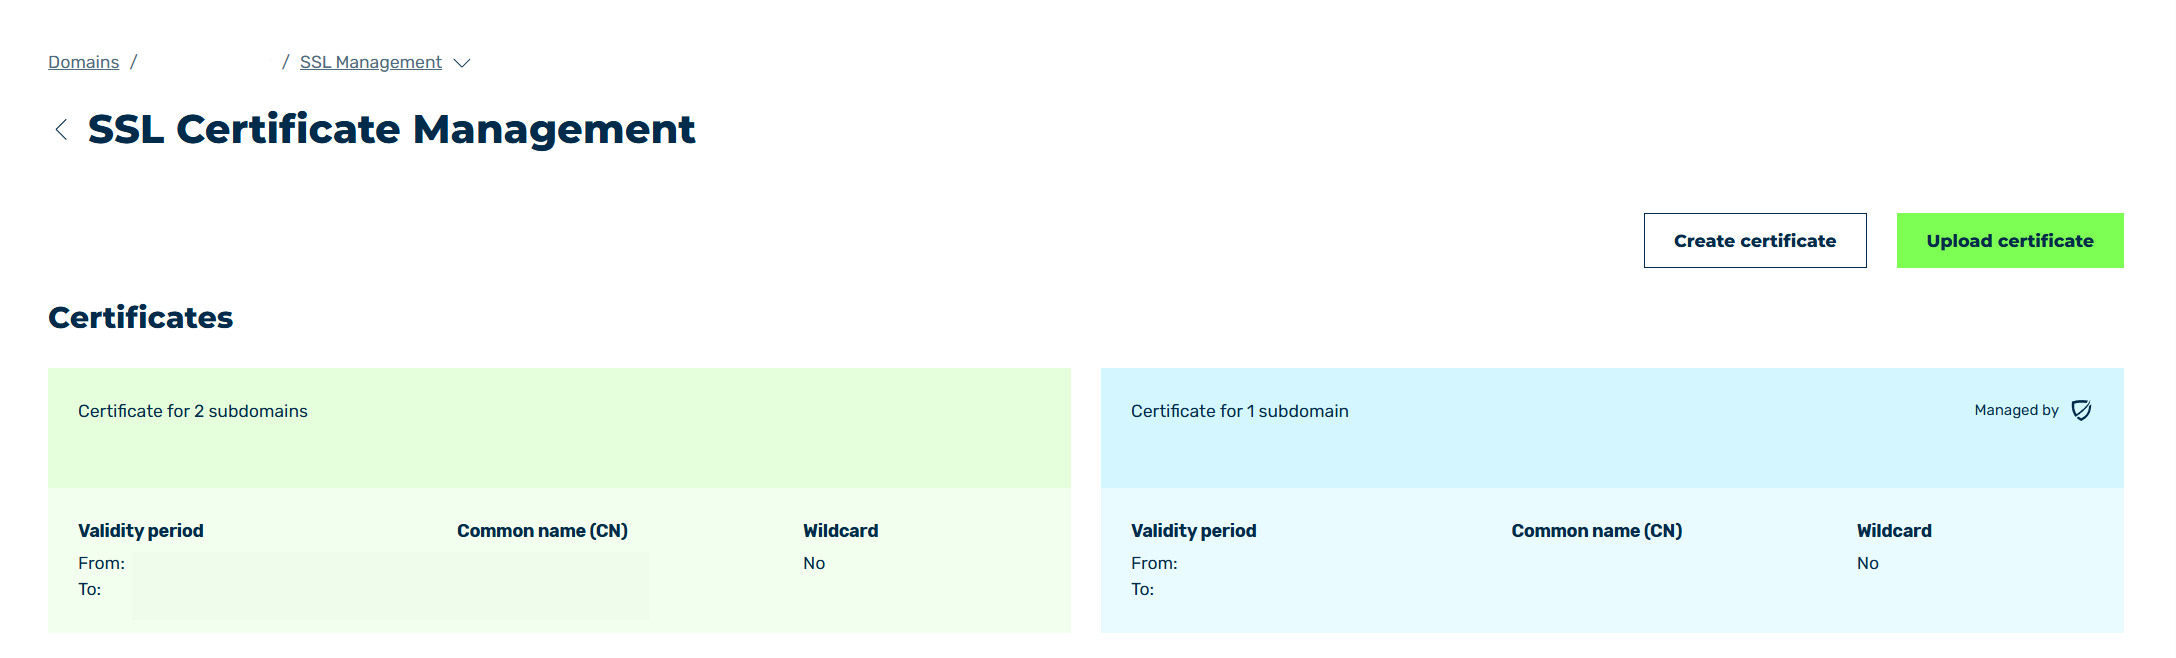
SSL/TLS Certificate Management view with SSL/TLS certificate